SCIM
Users stored in SCIM can be imported into the Identity Server.
In this tutorial, we will explain how to import users from SCIM to the Identity Server.
Create some users
Open POSTMAN and execute the following requests to create two users.
First request
HTTP POST : http://localhost:5003/Users

Authorization Bearer ba521b3b-02f7-4a37-b03c-58f713bf88e7

Content
{
  "schemas": [
    "urn:ietf:params:scim:schemas:core:2.0:User",
    "urn:ietf:params:scim:schemas:extension:enterprise:2.0:User"
  ],
  "userName": "firstUser",
  "active": true,
  "displayName": "lennay",
  "externalId": "e1f4c134-2dec-4754-bb50-9e786e4ecae9",
  "department": "Department",
  "name": {
    "formatted": "Andrew Ryan",
    "familyName": "Ryan",
    "givenName": "Andrew"
  },
  "emails": [
    {
      "primary": true,
      "type": "work",
      "value": "andrew@gmail.com"
    },
    {
      "primary": false,
      "type": "home",
      "value": "andrewhome@gmail.com"
    }
  ]
}
Second request
HTTP POST : http://localhost:5003/Users

Authorization Bearer ba521b3b-02f7-4a37-b03c-58f713bf88e7

Content
{
  "schemas": [
    "urn:ietf:params:scim:schemas:core:2.0:User",
    "urn:ietf:params:scim:schemas:extension:enterprise:2.0:User"
  ],
  "userName": "secondUser",
  "active": true,
  "displayName": "lennay",
  "externalId": "e1f4c134-2dec-4754-bb50-9e786e4ecae9",
  "department": "Department",
  "name": {
    "formatted": "Andrew Ryan",
    "familyName": "Ryan",
    "givenName": "Andrew"
  },
  "emails": [
    {
      "primary": true,
      "type": "work",
      "value": "andrew@gmail.com"
    },
    {
      "primary": false,
      "type": "home",
      "value": "andrewhome@gmail.com"
    }
  ]
}
Extract
Browse the administration UI, navigate to the Identity Provisioning screen, and click on SCIM.
In the Properties tab, you can update the attributes of the extraction job
| Field | Description |
|---|---|
| Authentication Type | Specify how to retrieve the access token. By default the value is APIKEY |
| API Key | When authentication type is equals to APIKEY then the APIKEY must be specified |
| ClientId | When authentication type is equals to CLIENT_SECRET_POST then the ClientId must be specified |
| ClientSecret | When authentication type is equals to CLIENT_SECRET_POST then the ClientSecret must be specified |
In the scope of this tutorial, the default values are correct and should not be updated.
The Mapping Rules tab contains the rules used by IdServer to map properties from SCIM to user attributes / properties.

Before launching the extraction, ensure that both the Identity Server and the Administration UI are launched.
Click on the Histories tab and then click on the Launch button.
Wait for a few seconds and then refresh the page. A new line should appear in the table indicating that 2 records have been extracted from SCIM.
Import
Navigate to the Identity Provisioning screen and click on the Import button.
Wait for a few seconds and then refresh the page. A new line should appear in the table indicating that 2 records have been imported into the Identity Server.
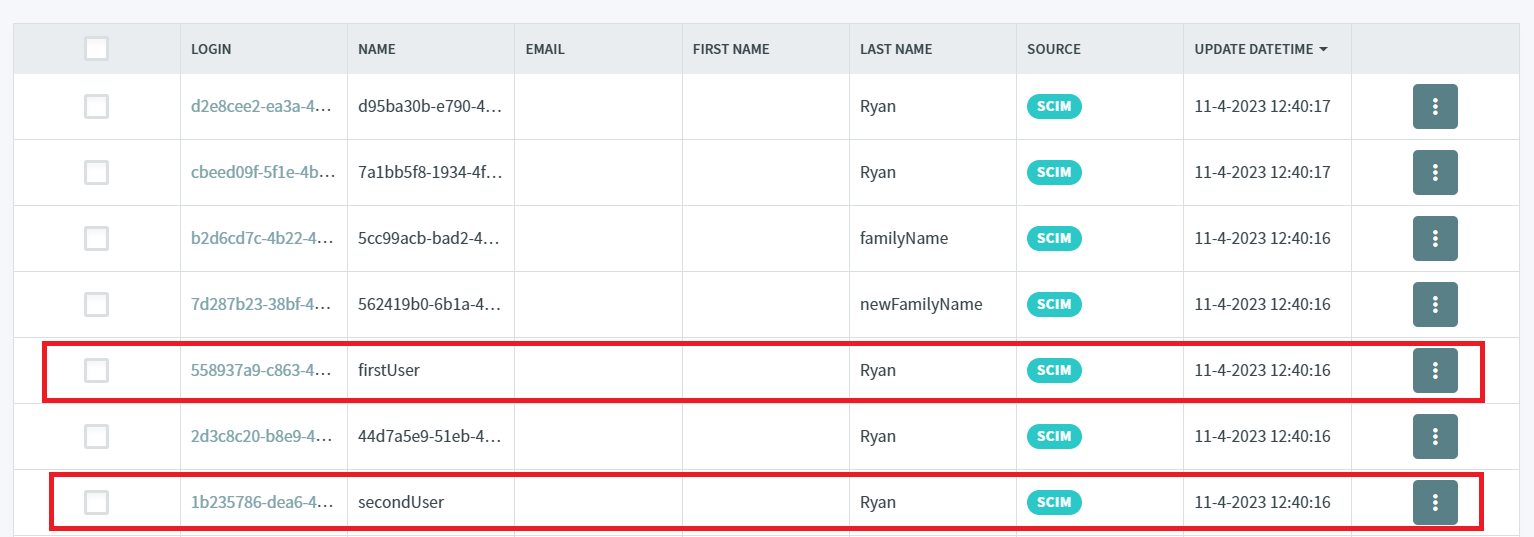
Both users are visible on the Users screen.
Because the SCIM API does not store passwords, it is not possible to authenticate with a newly imported SCIM user unless at least one credential has been defined.
