Installation
The entire SimpleIdServer solution can be easily installed and deployed through various methods: Copy and Paste, Docker or Kubernetes.
If you want to install only certain parts of the solution or customize specific features like the UI, you can use our DOTNET Template project.
Install the entire solution with a single command..
Utilize our DOTNET Template to install specific parts of the solution.
Copy and paste
Installing SimpleIdServer is as simple as downloading it, unzipping it, and updating the connection string. By default, the project is configured to use the SQLServer database. Other databases are supported. For more information, refer to the configuration section.
The archive folder contains three projects:
| Name | Port | Description |
|---|---|---|
| IdServer | https://*:5001 | Identity server |
| IdServerWebsite | https://*:5002 | Administration website |
| Scim | https://*:5003 | SCIM server |
The technical account used to run the IdServer and Scim servers must have the privilege to create tables and databases. Otherwise, the application cannot deploy the database.
By default, the development certificate is utilized to host the applications under HTTPS. To install it on your local machine, execute the command line dotnet dev-certs https.
For more information, refer to the documentation.
Windows
Procedure :
- Download the zip file.
- Extract the contents into a directory.
- In each subfolder, locate the
appsettings.jsonfile. Open your preferred text editor and update the Connection String. - Open three PowerShell prompts and navigate to the subdirectories:
IdServer,ScimandIdServerWebsite. - Execute the command
run.ps1.
Linux
Procedure :
- Download the zip file using the following command:
wget https://github.com/simpleidserver/SimpleIdServer/releases/latest/download/SimpleIdServer-Linux-x64.zip
- Extract the contents into a directory using the following command:
unzip SimpleIdServer-Linux-x64.zip -d SimpleIdServer-Linux-x64
- In the subdirectories, you will find two scripts. Use
run.shto launch the service andinstall-daemon.shto install the server as a daemon service.
Docker
It is possible to run the SimpleIdServer solution through Docker.
In this setup, the domain localhost.com is used to represent the domain on which the solution is hosted. Therefore, the first step is to ensure that the domain localhost.com resolves to the Docker host machine.
To achieve this, edit your hosts file and add the following entry:
127.0.0.1 localhost.com scim.localhost.com idserver.localhost.com website.localhost.com
The location of the hosts file varies based on the operating system:
| Operating System | Path |
|---|---|
| Linux | \etc\hosts |
| Windows | C:\Windows\system32\drivers\etc\hosts |
Next, download the Docker archive, extract the contents into a directory, and execute the command docker-compose up.
Now, SimpleIdServer is ready to be used, and the services can be accessed through the following URLs:
| Service | Url |
|---|---|
| IdServer | https://idserver.localhost.com/master |
| IdServerWebsite | https://website.localhost.com |
| Scim | https://scim.localhost.com |
Kubernetes
It is possible to run the SimpleIdServer solution through Kubernetes.
In this setup, the domain sid.svc.cluster.local is used to represent the domain on which the solution is hosted. Therefore, the first step is to ensure that the domain sid.svc.cluster.local resolves to the Docker host machine.
To achieve this, edit your hosts file and add the following entry:
127.0.0.1 sid.svc.cluster.local scim.sid.svc.cluster.local idserver.sid.svc.cluster.local website.sid.svc.cluster.local
Next, ensure that you have Minikube installed on your local machine. You can download it from Minikube.
Download the Kubernetes archive file and extract its contents into a directory. Open a command prompt and navigate to this directory. Execute the following commands to start the solution:
minikube start
minikube addons enable ingress
eval $(minikube -p minikube docker-env)
kubectl apply -f sid-kubernetes.yaml
minikube tunnel
Now, SimpleIdServer is ready to be used, and the services can be accessed through the following URLs:
| Service | Url |
|---|---|
| IdServer | https://idserver.sid.svc.cluster.local/master |
| IdServerWebsite | https://website.sid.svc.cluster.local |
| Scim | https://scim.sid.svc.cluster.local |
DOTNET Template
Install SimpleIdServer templates.
dotnet new --install SimpleIdServer.Templates
This will add the following templates
| Command line | Description |
|---|---|
| dotnet new idserver | Create Identity Server. By default, Entity Framework is configured to use SQLServer |
| dotnet new idserverwebsite | Create Identity Server website. By default, Entity Framework is configured to use SQLServer |
| dotnet new scim | Create SCIM Server. |
Create Visual Studio Solution
Open a command prompt and execute the following commands to create the directory structure for the solution.
mkdir Quickstart
cd Quickstart
mkdir src
dotnet new sln -n Quickstart
Create IdentityServer project
To create a web project named IdServer with the SimpleIdServer.IdServer package installed, execute the command line :
cd src
dotnet new idserver -n IdServer
The following files will be created within a new src/IdServer directory :
IdServer.csproj: Project file with theSimpleIdServer.IdServerNuGet package added.appsettings.json: Contains the ConnectionString.Program.cs: Main application entry point.IdServerConfiguration.cs: Contains theClients,Resources.
Next, add the IdServer project into the Visual Studio Solution
cd ..
dotnet sln add ./src/IdServer/IdServer.csproj
Run the IdServer project, ensuring that it listens on the URL https://localhost:5001.
cd src/IdServer
dotnet run --urls=https://localhost:5001
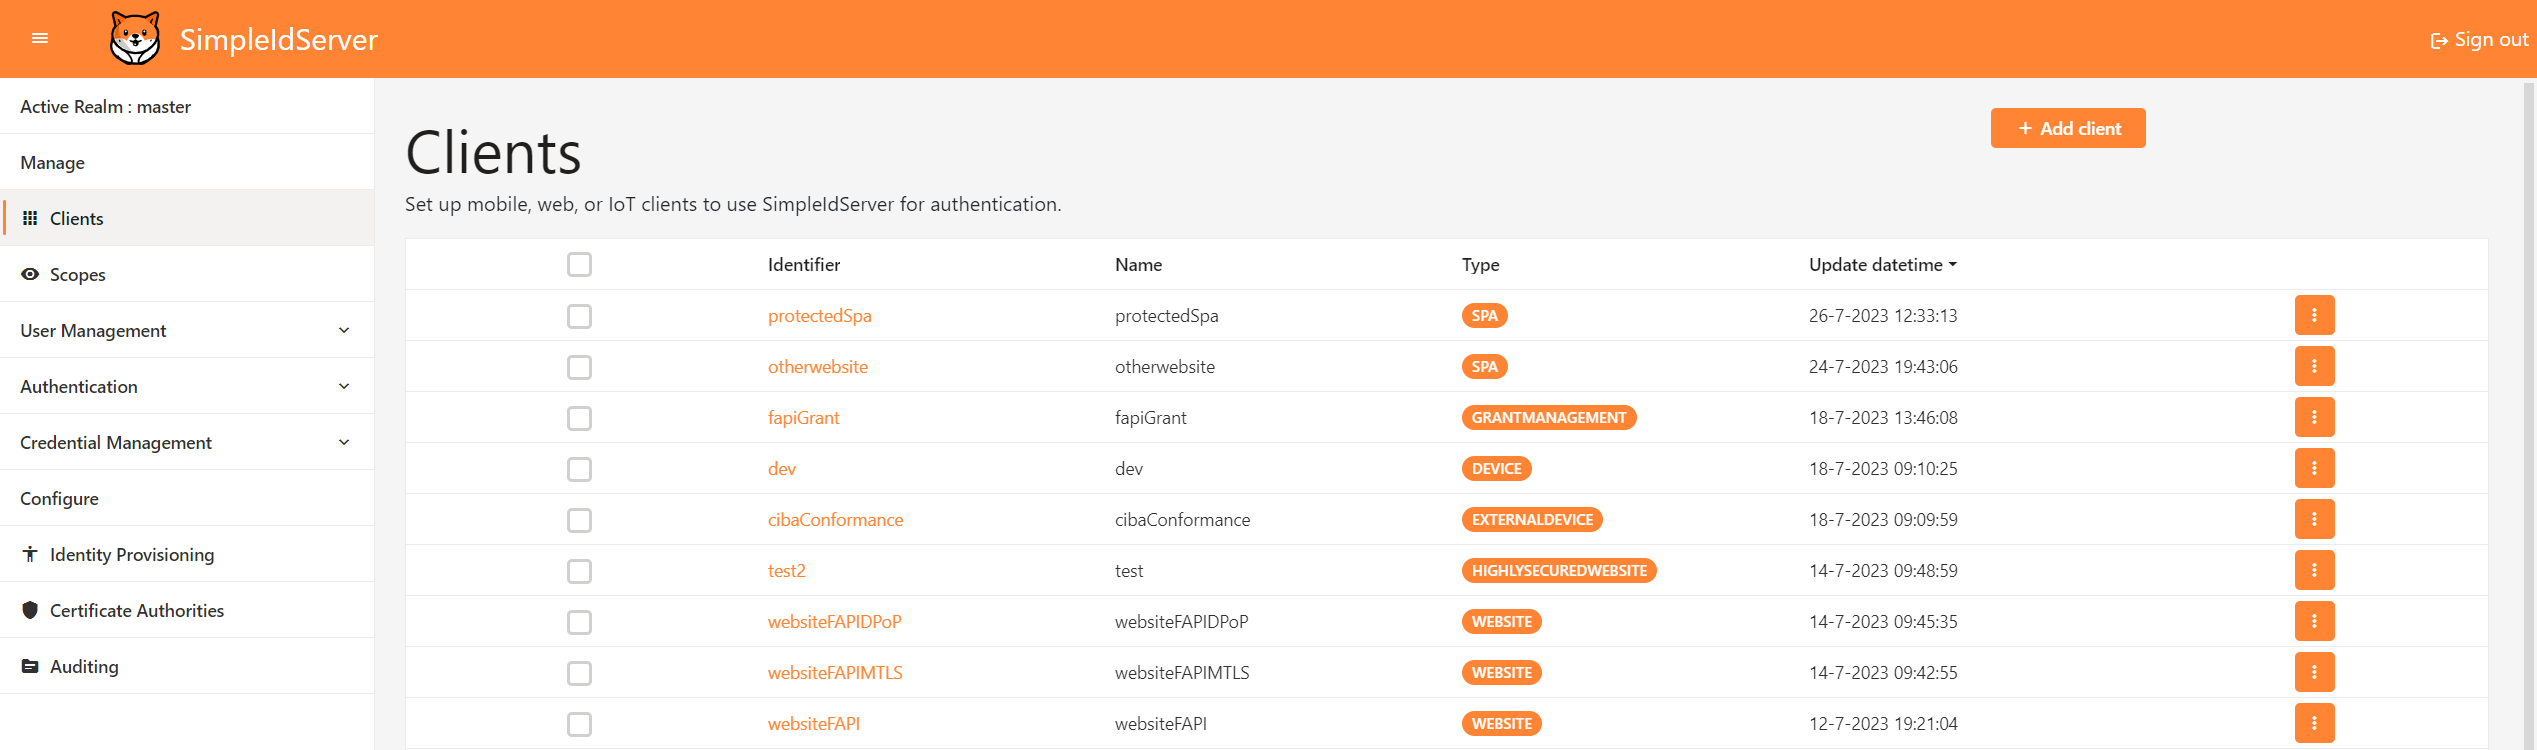
The IdentityServer is now ready to be used.
By default, there is one administrator account configured. You can access their profile by navigating to the URL https://localhost:5001/master and authenticate using the following credentials :
- Login : administrator
- Password : password
IdentityServer UI preview
The IdentityServer UI uses Bootstrap 5.
Create IdentityServer website project
create a web project named IdServerWebsite with the SimpleIdServer.IdServer.Website package installed, execute the command line :
cd src
dotnet new idserverwebsite -n IdServerWebsite
Run the IdServerWebsite project, it must listens on the url https://localhost:5002.
cd src/IdServerWebsite
dotnet run --urls=https://localhost:5002
The IdentityServer website is now ready to be used.
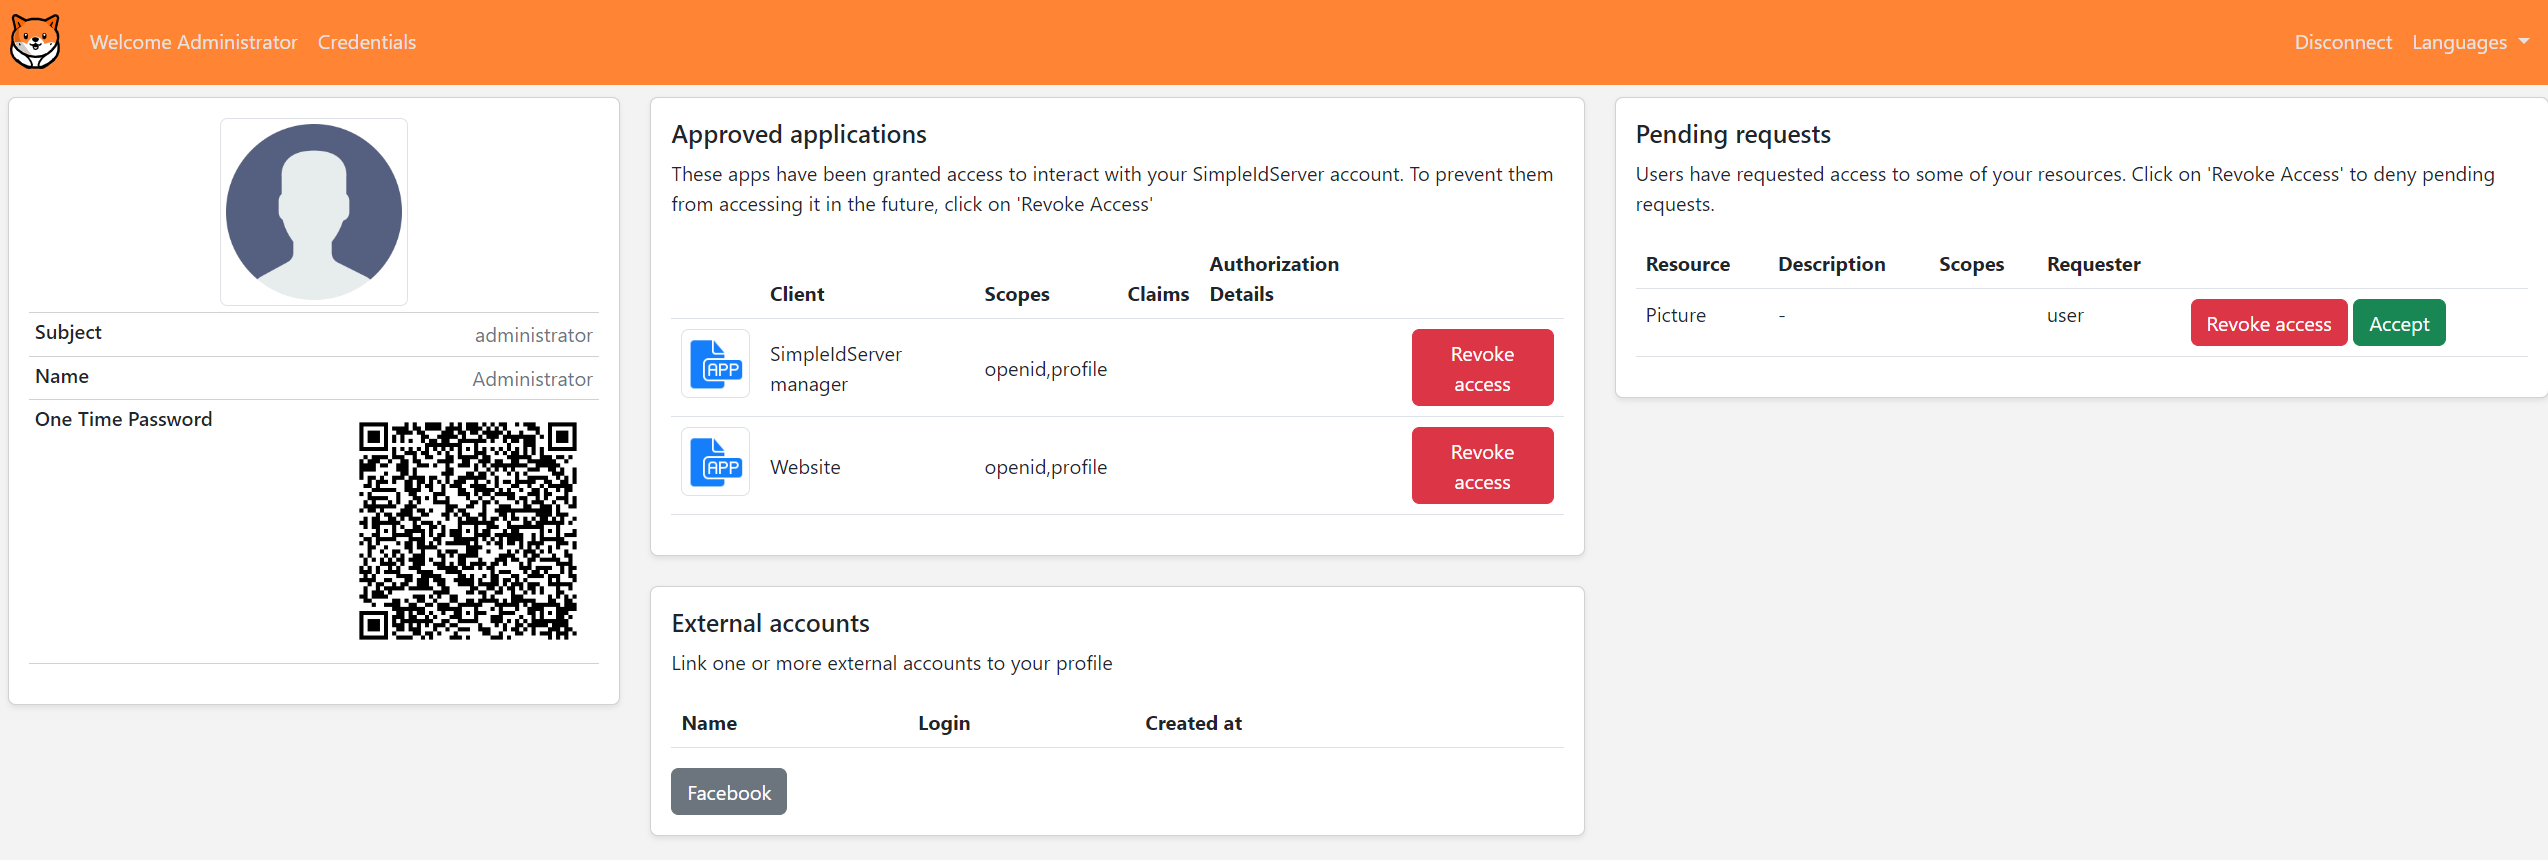
The website can be used to manage all aspects of an Identity Server solution, such as managing clients, users, and scopes.
Identity Server website UI preview
The IdentityServer website UI uses Radzen.
SCIM Security
By default SCIM is configured to use API KEY authentication.
For clients to perform any operation, they must include one of those keys in the HTTP HEADER Authorization Bearer field.
| Owner | Value |
|---|---|
| IdServer | ba521b3b-02f7-4a37-b03c-58f713bf88e7 |
| AzureAd | 1595a72a-2804-495d-8a8a-2c861e7a736a |
Create SCIM project with EF support
Create a web project named ScimEF with the SimpleIdServer.Scim.Persistence.EF package installed and Entity Framework (EF) configured to use SQLServer, execute the command line :
cd src
dotnet new scim -n ScimEF --connectionString "Data Source=.;Initial Catalog=SCIM;Integrated Security=True;TrustServerCertificate=True" -t "SQLSERVER"
Next, add the ScimEF project into the Visual Studio Solution
cd ..
dotnet sln add ./src/ScimEF/ScimEF.csproj
Run the ScimEF project, ensuring that it listens on the URL https://localhost:5003.
cd src/SCIMEF
dotnet run --urls=https://localhost:5003
Now that the SCIM server is running, you can check its Schemas endpoint by accessing https://localhost:5003/Schemas.
Create SCIM project with MongoDB support
To create a web project named ScimMongoDB with the SimpleIdServer.Scim.Persistence.MongoDB package installed and MongoDB support, execute the command line :
cd src
dotnet new scim -n ScimMongoDB --connectionString "mongodb://localhost:27017" -t "MONGODB"
Next, add the ScimMongoDB project into the Visual Studio Solution
cd ..
dotnet sln add ./src/ScimMongoDB/ScimMongoDB.csproj
Run the ScimMongoDB project, ensuring that it listens on the URL https://localhost:5003.
cd src/ScimMongoDB
dotnet run --urls=https://localhost:5003
Now that the SCIM server is running, you can check its Schemas endpoint by accessing https://localhost:5003/Schemas.